Tuesday, September 24, 2013

Making A Custom Jersey Quilt

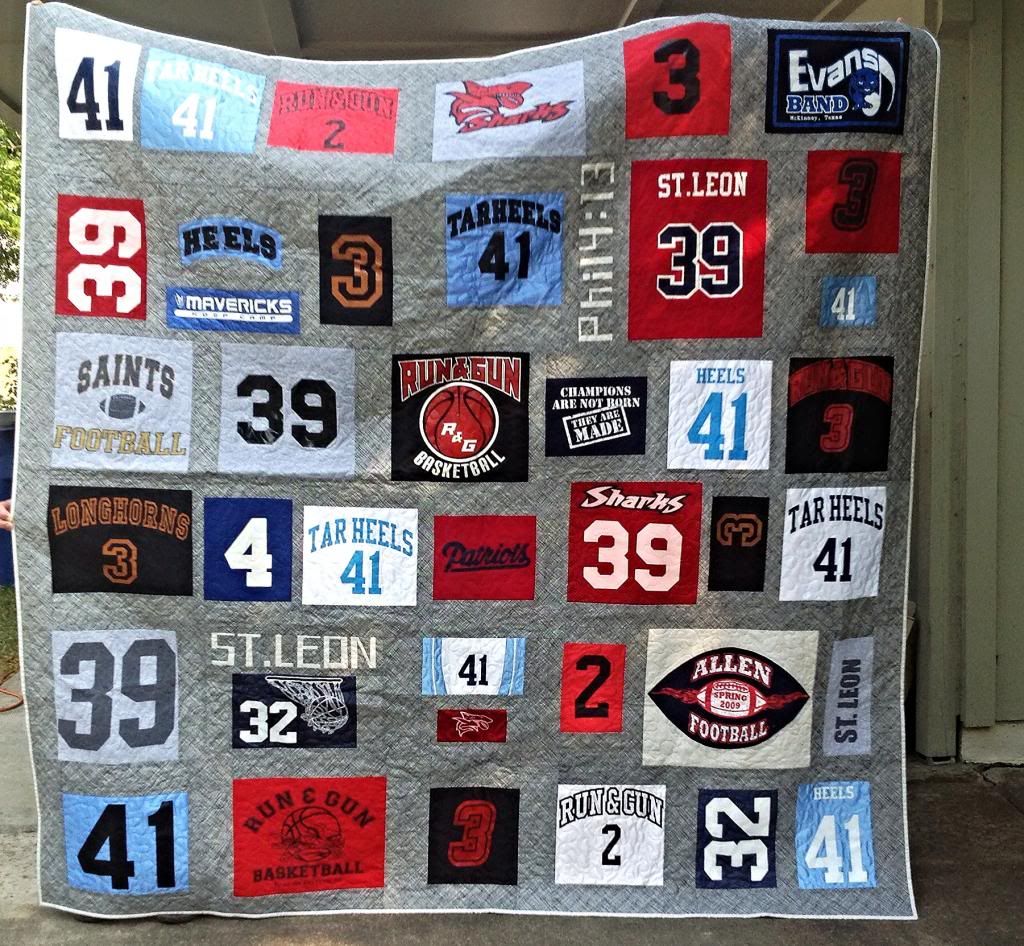
Recently I had the opportunity to make a custom memory quilt using jerseys and t-shirts.  I had yet to make or even see one in person but I had seen a few on Pinterest and through Google searches.  When I was approached about doing this quilt I wasn't exactly sure what I was getting myself into nor did I know what to charge because I really didn't know how long it would take me.

I was a little unsure about trying to piece and quilt a variety of fabric types including t-shirt jersey and polyester jersey with and without holes.  After doing a little research I was able to determine what supplies I would need and how much of each.  I found out that the key was to stabilize the backs of each shirt to make it easier to piece and quilt.  I chose to use SF 101 which is a cotton weave and would work well with the cotton sashing fabric I was using.  It was also great for the jerseys that were a little wholier than others.  The woven interfacing made it look like a piece of fabric was underneath the jersey.

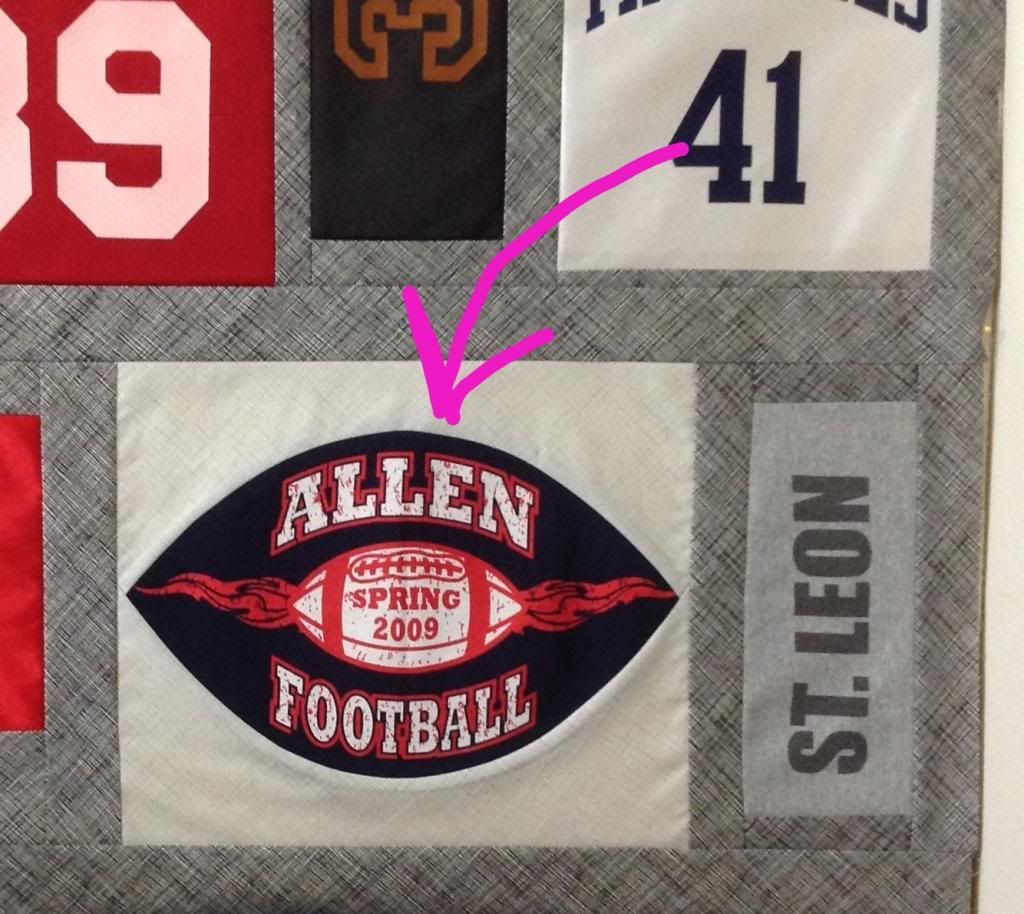
When I was cutting out the jerseys I learned my next lesson... Cut out more of the t-shirt that you want to use, you can always make it smaller later.  There were also some cool logos on the shirts that I wanted to highlight but to do this I needed to sew a curved seam.  I have never sewn two curved pieces of fabric together before much less tried to cut two pieces of curved fabric that are suppose to fit together!  Was a little nervous about this one.  Luckily I found this great tutorial about sewing curves.


It was a lot easier than I had expected.  I must make a curvy quilt soon!
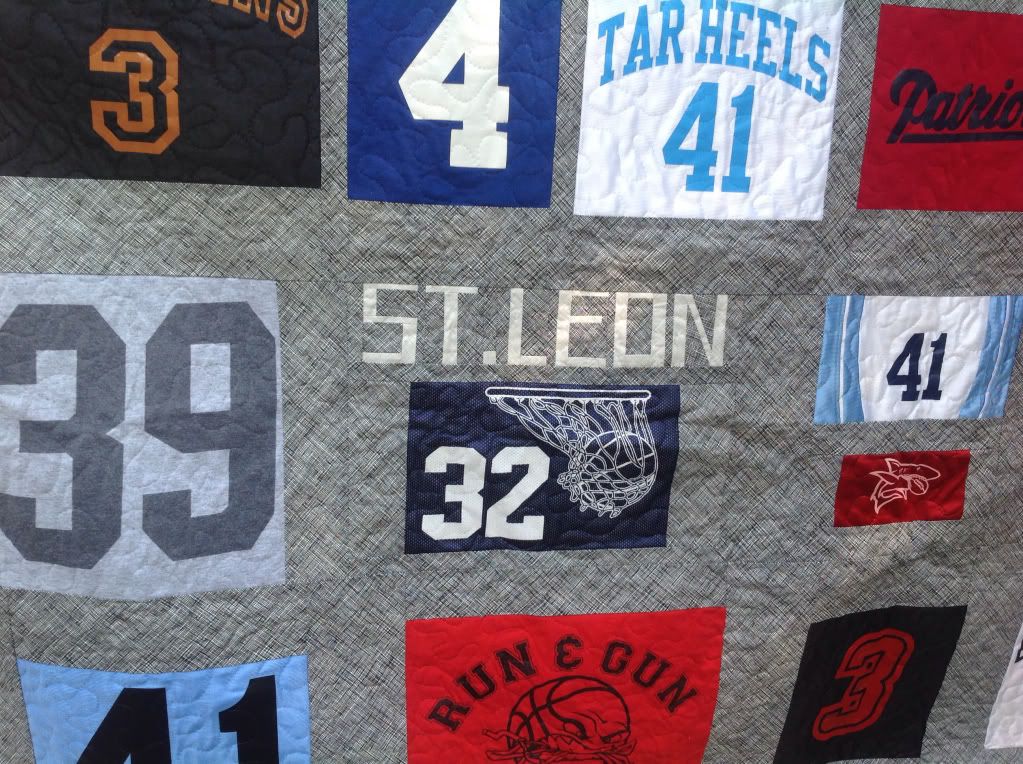
I also wanted to personalize the quilt a bit by adding in their last name.  A few shirts had the name on it that I was able to use and then I paper pieced the last name too to add in a little more of the grey crosshatch to the quilt top.


My overall goal was to make the quilt top using a mosaic layout.  I basically split the quilt top into 4 sections and just worked on one section at a time. When each section was done I pieced the four sections together to get my 80 x 80 quilt top.  I found out my math skills are not as good as they use to be.  I really need one of those handy fabric calculators I've seen at Jo-Ann.


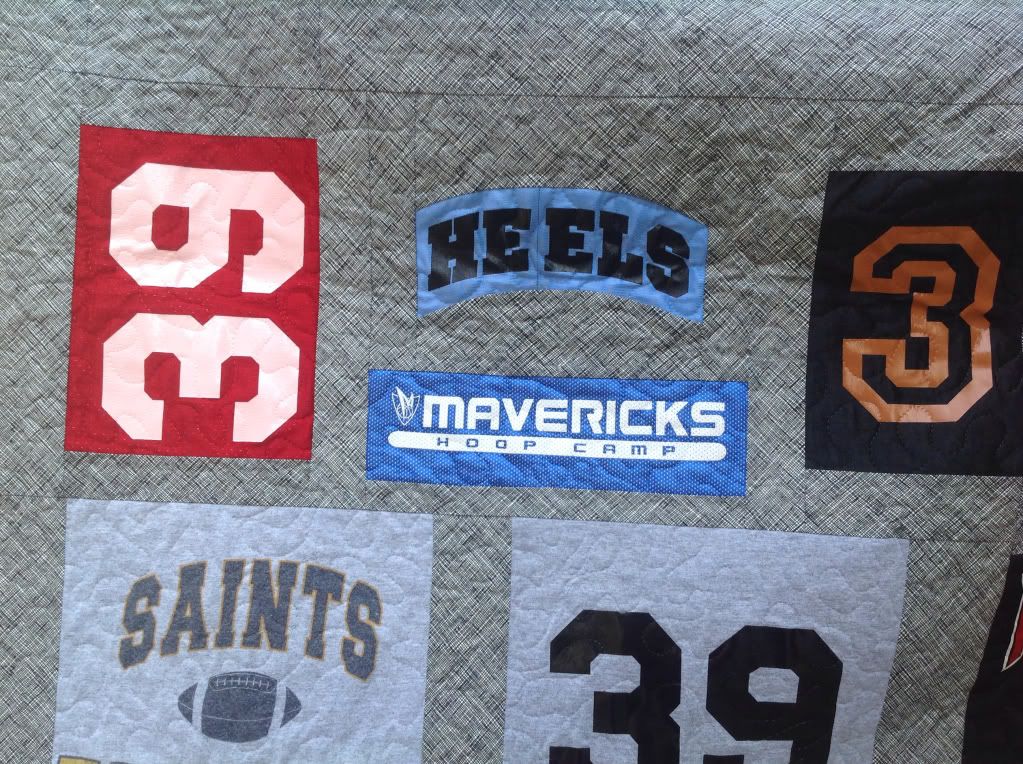
The next challenge was quilting it. I struggled with what color of thread to use since there were so many bold colors in this quilt.  In the end I decided on an invisible thread for the top and a light grey for the bobbin thread.  It was a little tricky to stipple and I had to really mess with the thread tension to get it to look right.  Another problem I ran into with the invisible thread was that it was so difficult to see where I had already quilted.  Much tougher than I thought it would be.  But I loved the outcome of the stippling. You can't see the thread the quilt just looks textured.


After it's all said and done I really like the quilt.  Some of the spacing could have been better but not too bad for my 1st time out. 
If you have ever made a jersey quilt what are your pointers?  I would love to hear what you learned.
I hope to get to do a few more...and just FYI I'm always excepting custom work and can be contacted via email: halfstitched@gmail.com

Wednesday, September 11, 2013

Nobody Likes Shrinkage

Lately I've been making a lot of bags which require precise cutting for numerous pieces.  I'm very careful when cutting fabric and try to make the most of my yardage by snugly placing pattern pieces right next to each other.  While this seems effective I can't tell you how many times I've ended up having to recut pieces after I have ironed on the interfacing.

I love Pellon SF101 and use it on almost everything and when I buy it I buy by the bolt.  But there is a small problem with it... it shrinks and your fabric shrinks with it.  So many times I have told myself to iron on the interfacing before I cut out the pattern piece.  I tell myself lots of things and then usually forget it two seconds later.

Today hopefully this little lesson will stick.  As I was making multiple iPad cases assembly line style, I came across the problem again with certain pieces not matching up like they should.  I had to recut a few pieces and finally decided it was time to iron on the interfacing first.


You can see in this picture how much the fabric had shriveled up.  It was almost a 1/2 inch difference.


I think in the end I will save more fabric by cutting out squares of fabric and affixing the interfacing first. Beats having to stop everything and re-cut the piece.  And if I may say so myself, my iPad cases are "sick" and I can't wait till they are all done and I can show them off.  It's really cool when you have a vision and are able to break down the necessary steps and seams to pull it off.

On another note I've got some cool new fabric bundles in the shop just click here for all my Christmas related items.

Happy Sewing!
09 10 11 12
Blogging tips